mulberryshoots

"Tell me, what is it you plan to do with your one wild and precious life?" ~ Mary Oliver

Category: Food

clean up! cook in! . . .

sticky rice cooking beside chinese chives, bitter melon, bean sprouts,  cilantro, ground pork, shrimp and cucumbers

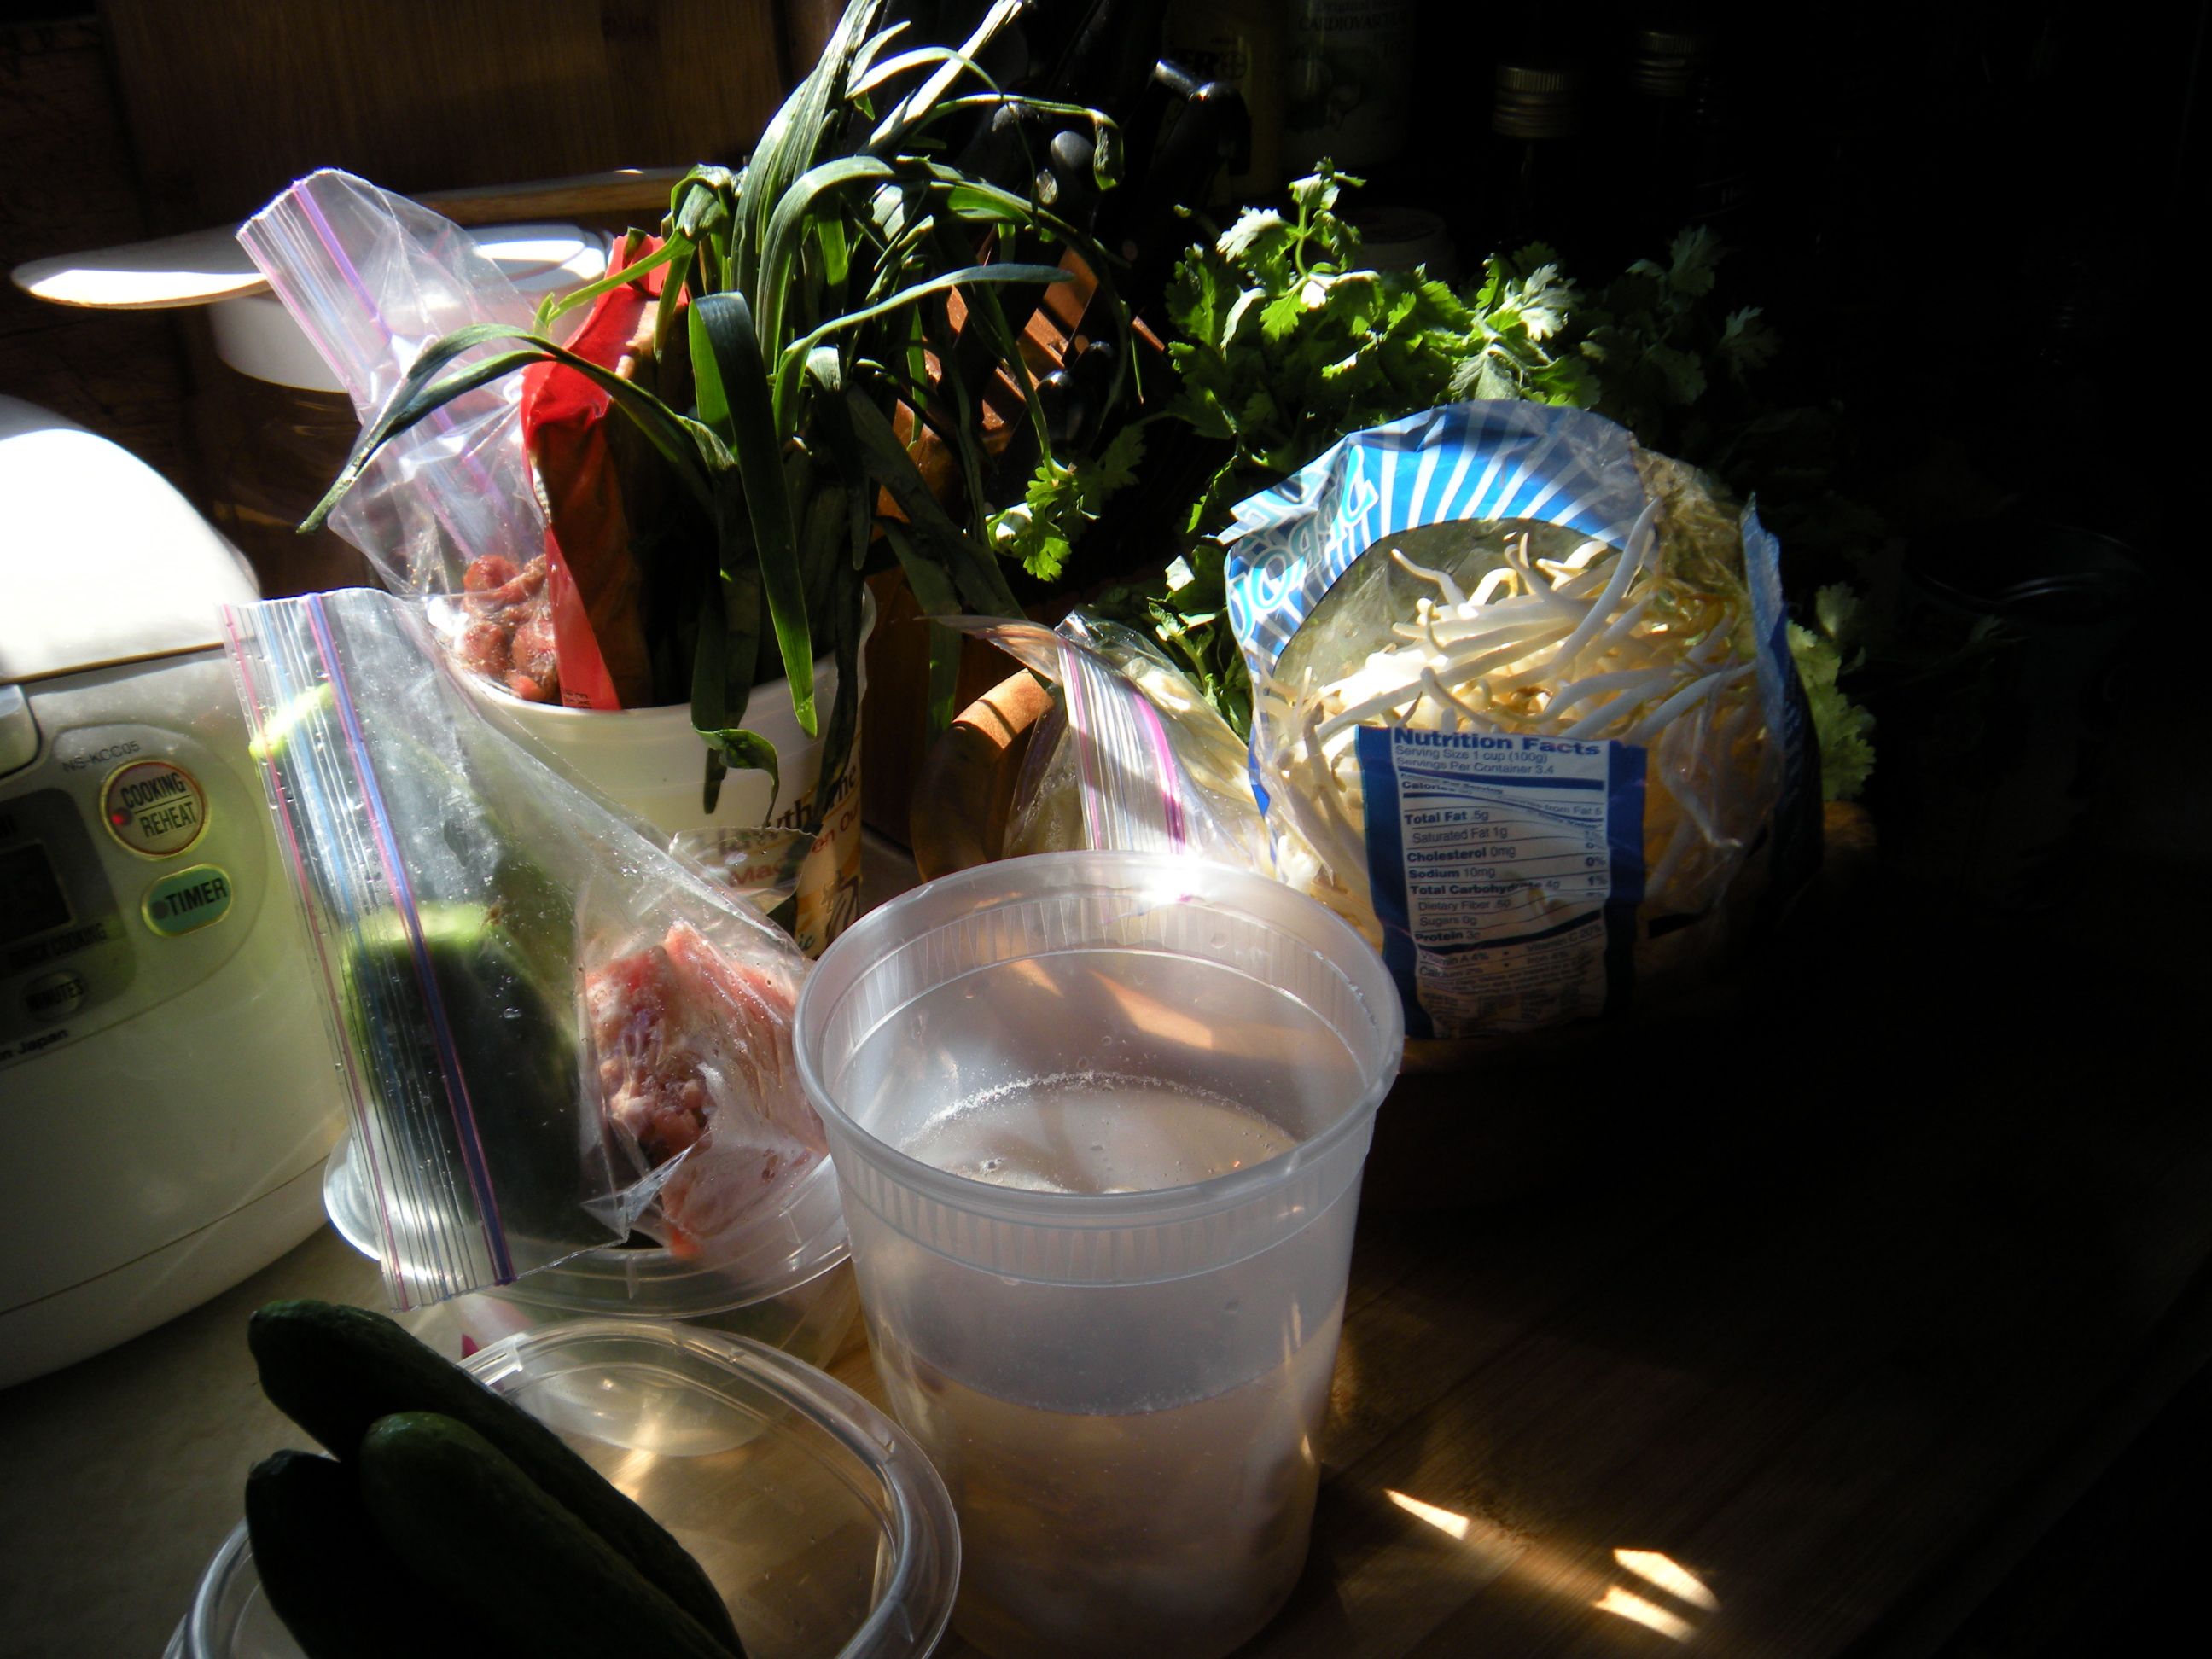
sticky rice cooking beside chinese chives, bitter melon, bean sprouts, cilantro, shrimp and cucumbers


Okay, so today is a gloriously sunny day with a nice breeze outside which can only mean one thing: strip the bed of our winter flannel sheets with colorful fish printed on them, wash a fresh mattress cover, then wash our usual white damask sheets and pillowcases and hang them all out on the clothesline to dry. The turnover from flannel sheets to fragrant cotton sheets dried in the sun feels just right for today.

In the kitchen, the rice cooker is already steaming, making its way to heavenly, aromatic sticky rice that will become more tender as the day goes by. I rummaged around in the fridge because about five days ago, I stopped by the 88 Asian food market when I went into town for a doctor appointment, and went wild for fresh greens all of which cost under a dollar or two: a huge bunch of fresh cilantro, chinese chives, two medium sized bitter melon, three tiny Portuguese cucumbers, fresh watercress, scallion and fresh bean sprouts which usually wilt and go bad before I get around to using them. But, not TODAY!, she says. One of my pet peeves with myself is being too ambitious while buying groceries and then not carrying through to cook everything while they are still fresh.

So, here goes. My plan this afternoon is to:

Make bitter melon stuffed with ground pork and shrimp:
Prepare the bitter melon by cutting them lengthwise and removing the seeds and spongey insides; slice the cleaned halves into 2-3 inch pieces. Chop three large, raw shrimp and add to fresh ground pork. Add chopped green onion, soy, sherry, cornstarch and an egg. Mix well. Heat up a skillet and add grapeseed oil. Scoop up the stuffing mixture into the pieces of melon, then place them stuffing side face down into to the hot oil until nicely browned. Carefully turn them over with a spatula and cook the remaining pieces of squash and stuffing. When all the pieces have been browned and turned over to the melon side, add half a can of chicken broth and cover the pan with a lid. Simmer for twenty minutes or until the squash is cooked through and soft. Hold at room temperature until ready to serve.

browning stuffed bitter melon pieces

browning stuffed bitter melon pieces


steaming bitter melon in chicken broth

steaming bitter melon in chicken broth


For dinner, I’ll combine three organic eggs from the egg farm in Concord (on the way to the 1st doctor appt.,) chopped scallion pieces, cleaned shrimp cut into bite size pieces, fresh watercress and cilantro leaves; a handful of fresh bean sprouts, mix the whole thing together and fry pancake size fritters in a good sized skillet with sizzling grapeseed oil. Turn them over when golden brown and crisp, then fry on the other side until the choice shrimp pieces turn pink. Drain on paper towels. Serve with an oyster and soy sauce dipping combo diluted with a little water and with a little seasoned Marukan vinegar. The sauce makes the whole shrimp/egg crunchy melange taste wonderful.
shrimp/bean sprout/egg fritters in the frying pan

shrimp/bean sprout/egg fritters in the frying pan


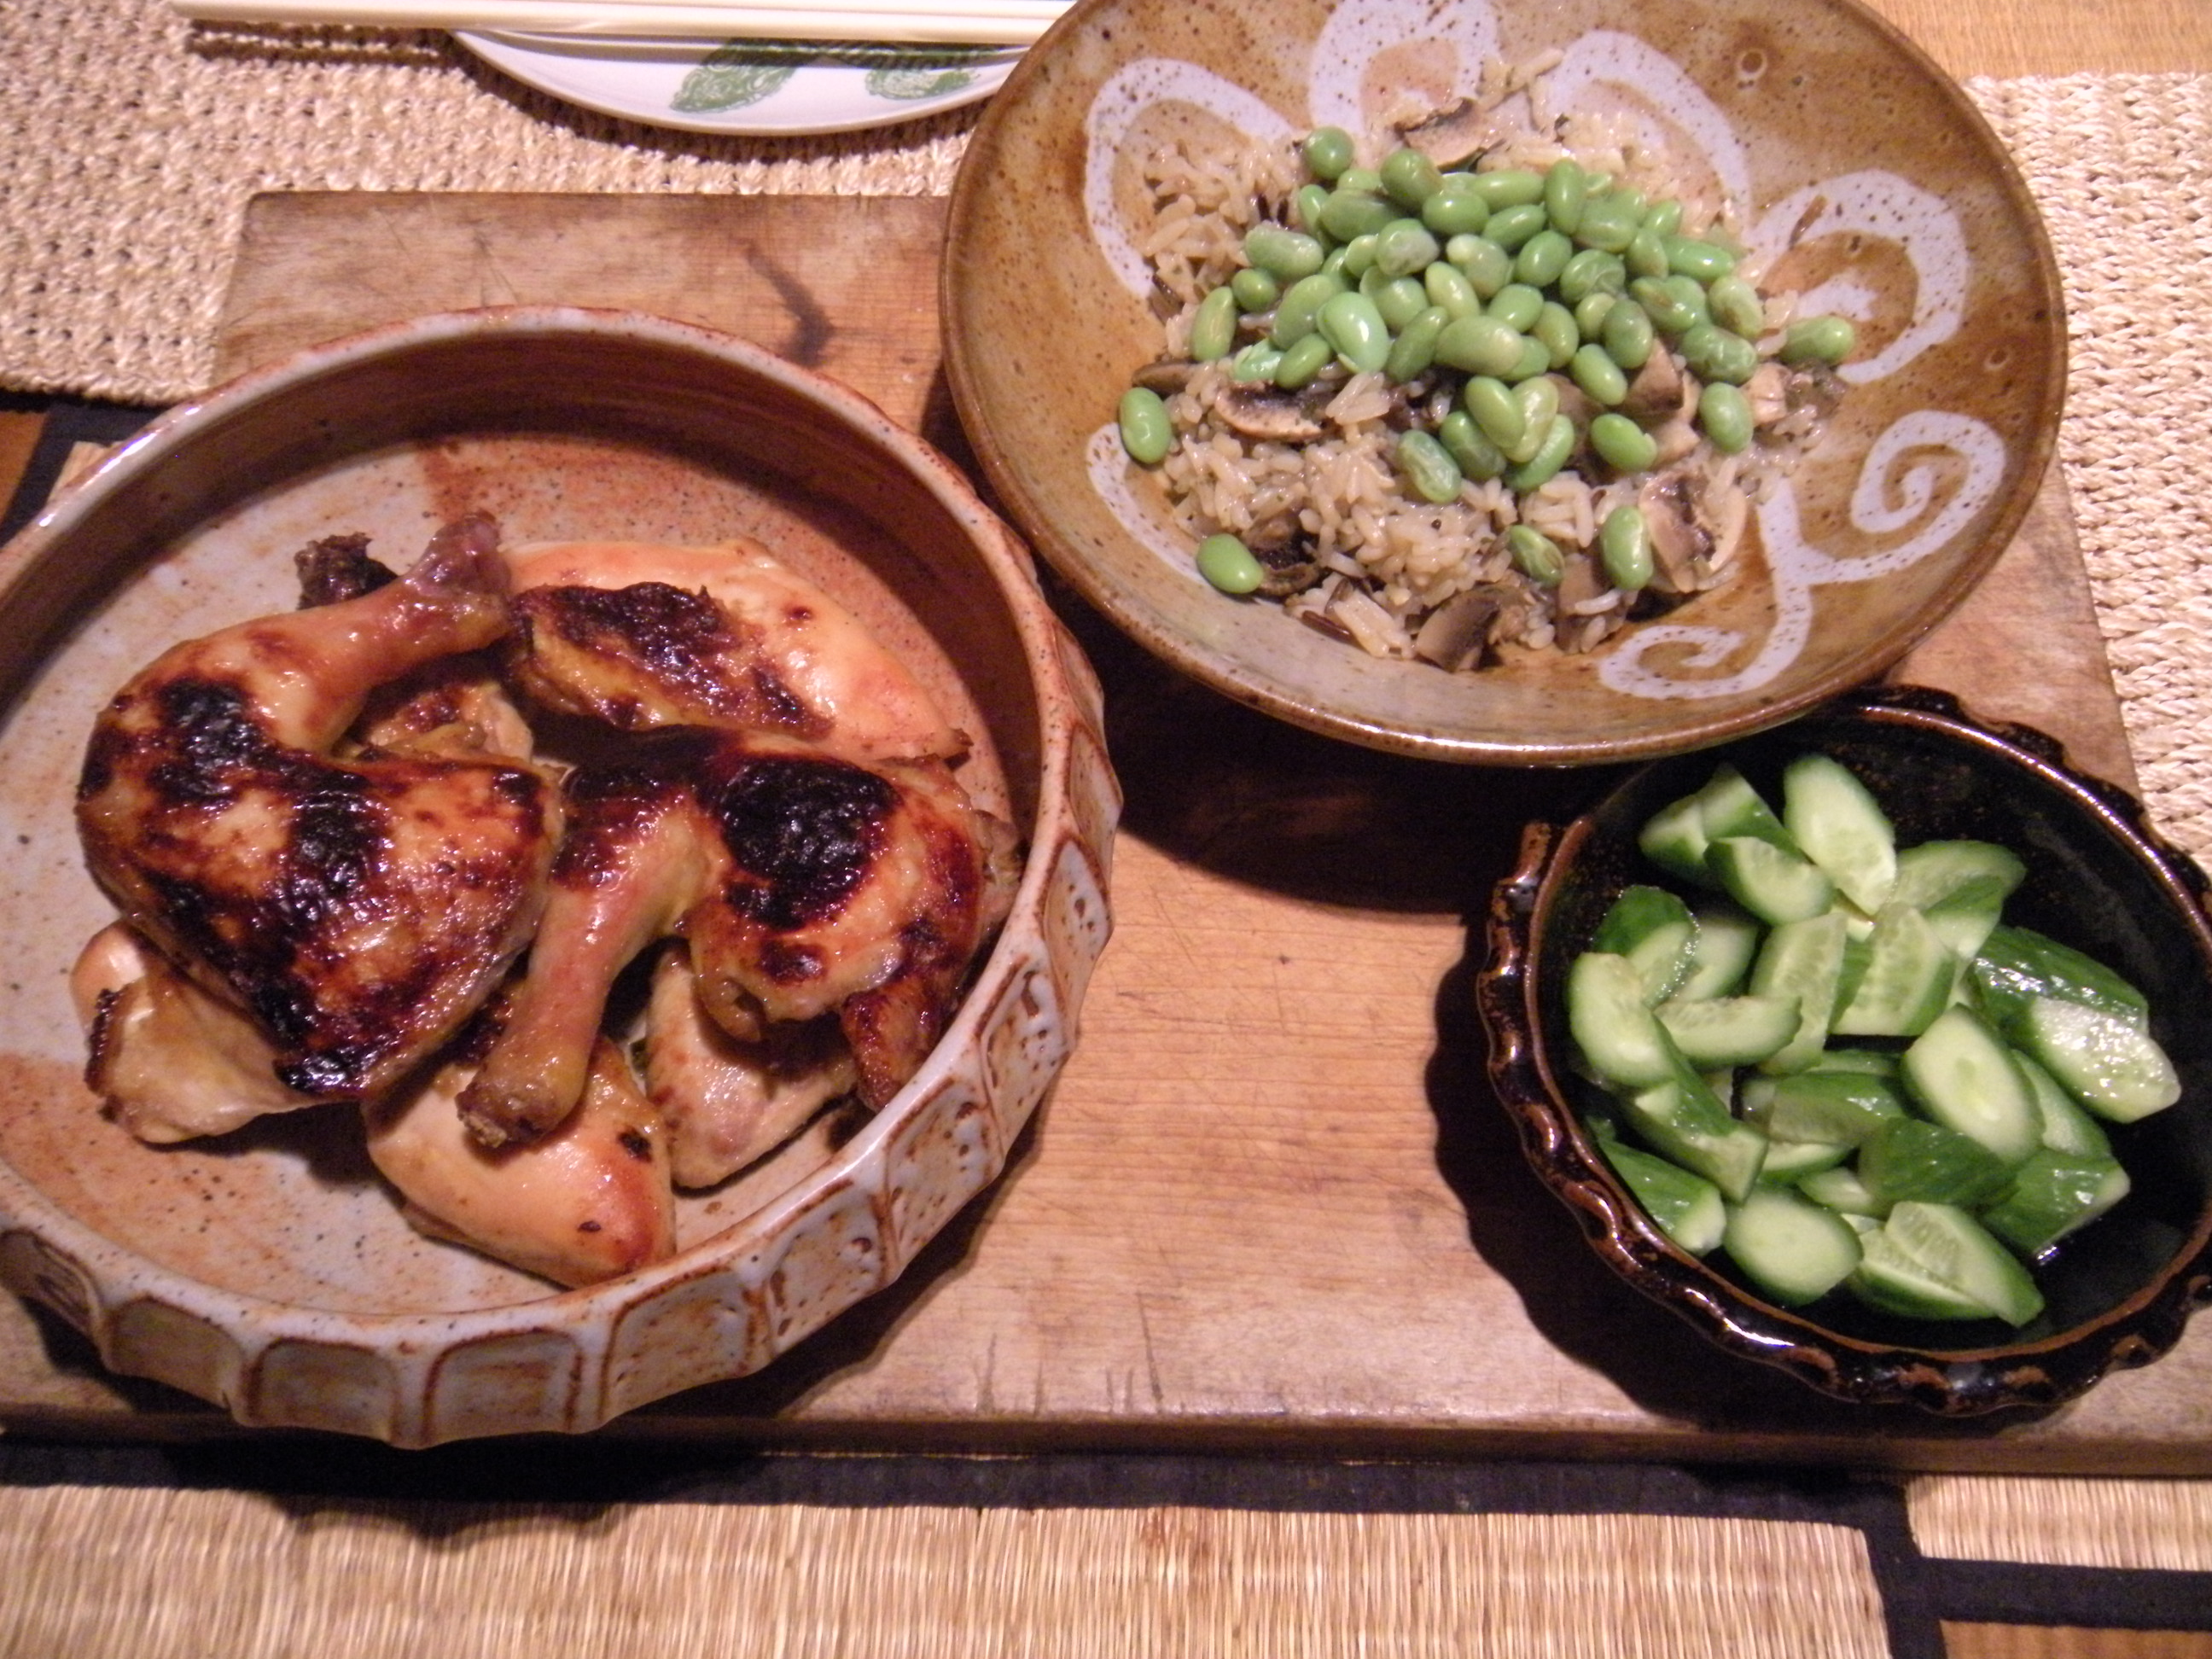
Served with sticky rice, the shrimp/beansprout fritters are the main dish; while the tender bitter melon with stuffing adds its own texture to the meal.
tonight's supper!

tonight’s supper!


Now, I feel a little less irresponsible for buying so many great fresh things–my eyes being bigger than figuring when we were going to eat it all before it spoiled. We will never starve, I think to myself, because all the groceries and little bits of pork and shrimp combined probably cost no more than eight to ten dollars! Tomorrow, I’ll saute the Chinese chives with 5 spice pressed tofu and char sui and make a tiny cucumber salad. For the next few days, we’ll have some tender leftover drunken chicken dipped in oyster sauce, stuffed bitter melon, pressed tofu and chinese chives and, of course, a fresh batch of sticky rice. I probably won’t have to cook again until the weekend!

On a nice Spring day like today, though, it’ll be a treat to have freshly laundered sheets on the bed and tasty morsels to pick and choose from on the kitchen table.

We are fortunate and we give thanks.

a day of rest . . .

dry ingredients for buddha's delight

dry ingredients for buddha’s delight

It’s unusual for me to be running around as much as I have this week because I’m usually quiet, staying put, reading, knitting, and so on as you can see from my blog. This week, though, I happened to have not one, but appointments to see TWO doctors, a City board meeting and a bunch of conference calls. So, today, now that I’m thankful and relieved to know that there’s nothing seriously wrong with me that ice packs, some drugs and ointment won’t heal, I’ve decided today will be a day of rest.

Many of you also know that when I take a quiet day or a day of rest, that it usually involves doing some cooking to relax. I’ve gotten into the mode of having a rice pot of sticky rice going most of the time. And if I make batches of other dishes that keep well in the fridge, then we have a few days where I can really take days of rest and do virtually nothing for us to eat really well for a few days running.

Since I visited my 92-year old relative a few weeks ago, and learning that she passed away on Wednesday morning of this week,
Pei fen
I’ve been wanting to make a dish called Buddha’s Delight, which she made for me a few years ago when I visited her after the big ice storm here in New England. Now, I want to caution you that HER version of Buddha’s Delight, served on old wooden plates, is not anything like what you might find on a Chinese restaurant menu, NOR in many Chinese cookbooks. I know because I’ve looked at them and they don’t resonate with my memory of what she made that day. Apparently, there are many variations of what goes into this dish (weird things like broccoli florets, carrots, snow peas, canned water chestnuts, etc.) It also turns out that this vegetarian dish is traditional for Chinese New Year (which has already gone by in January.)

pre-soaking tiger lily buds, tree ear and shitake mushrooms

pre-soaking tiger lily buds, tree ear and shitake mushrooms


But, I do remember the rather austere dish that she had made when we got together in her kitchen where the old brick patterned linoleum floor matched the one that I also had in my old Lexington house when the kids were young. The table was simply set, with wooden plates to eat the Buddha’s Delight with old bamboo chopsticks. That was all.

Here’s what I recall: a fragrant sauteed dish containing finely shredded cabbage (regular, not napa which is what the majority of recipes call for); tiger lily buds, black tree ear, cellophane noodles, dried shitake mushrooms, fresh bamboo shoots, the whole thing aromatically seasoned with green onions, ginger, good soy, mirin, a little sugar and sesame oil at the end to give it fragrance. So, that’s what I’m going to make today.

Buddha's Delight on the stove

Buddha’s Delight on the stove

For dessert, I went for some fragrant strawberries that were $2.99 for 16 ounces of fruit. It’s not really in season yet and I don’t usually buy them, but I thought they would be tasty, trimmed, cut up and macerated in fresh Meyer lemon juice and sugar ahead of time. Then later, a little fresh cream poured over the strawberry melange to eat for dessert. We’ve discovered that the cream thickens quite a bit when stirred with the lemon. G. took half a dozen large berries next door to his 94-year old mother and his brother, both of whom he reported had smiles on their faces when they saw these beauties.

strawberries in Meyer lemon and a little sugar

strawberries in Meyer lemon and a little sugar


So, that’s my idea for a day of rest. We’ll be able to eat the Buddha’s delight for a couple of days; I reheated the leftover roast duckling in the rice cooker which had almost finished steaming the new batch of sticky rice. Tomorrow, I’m planning to slice up a small white radish with greens, sprinkle fresh sea salt on it, rinse and dry it, then add some Japanese Marukan seasoned vinegar to slightly pickle it and serve with freshly washed and dried watercress after the stems have been removed. The radish-watercress salad will be a nice accompaniment for cool slices of drunken chicken dipped in an oyster sauce mix, with leftover Buddha’s Delight and sticky rice. The leftovers overlap and hopefully the flavors will mingle and complement each other.

Okay, that’s enough for now about food and cooking.

Photo postcript: Here’s a photo of our dinner tonight (Sunday)! Poached chicken legs, marinated in cooking sherry (Drunken chicken) and chilled. A white radish salad (this was great!) marinated in Marukan vinegar, a little sugar, soy, chinese black vinegar, scallions. The radish slices were crunchy and delicious; the cold chicken which I cut off the bone (since I don’t have a meat cleaver) and dipped in oyster sauce, organic soy, a little sugar, a drop or two of spring water. There was leftover Buddha’s Delight (just a little left); and Char sui roasted pork which we dipped into our ramen noodle broth with baby spinach. It was a tasty meal after another hard day of slogging through paperwork. Getting there, though.

Cold poached chicken, radish salad

sukiyaki! . . .

Rib eye for sukiyaki
On Monday, I went to a huge asian market on the way into town for another appointment. There, I picked up a package of gorgeous rib eye steak, sliced thin and gleaming up at me to make either sukiyaki or shabu shabu, both Japanese recipes that call for prime thinly sliced beef.

Back home, I pulled out a number of my Japanese cookery books, looked online for recipes and also consulted my daughter, M., who lived in Japan for six years and for whom sukiyaki is one of her favorite dishes. (Hopefully, this quest for perfect sukiyaki will take less time than the search for foolproof popovers!)

The first thing that caught my attention when reading the recipes was the way to handle the beautiful beef: instruction to pan fry the beef in the skillet and brown it first, adding sugar or not adding sugar. Then, putting it to the side of the skillet but still on the heat and boiling napa cabbage, tofu, sweet potato noodles, scallions, mushrooms, spinach, etc. in a seasoned broth with sake, mirin, soy and sugar. You’re supposed to let the combined mixture cook for ten minutes so that the flavors of the beef and broth permeate the other ingredients.

Sounds good to me, except what happens to the cooked beef while all the rest of this boiling of the stock goes on, and for ten minutes? Wouldn’t it be tough and chewy by the time everything else was cooked through enough, especially when we have such gorgeously THIN pieces of rib-eye?

Not finding anything in the recipes that allayed my concerns about over-cooking the beef, I decided to buy some sake, which I enjoy drinking anyhow, warmed up.

I think what I will do is to saute the beef slices in the beginning, remove most of it from the pan except for a couple of pieces left in the skillet to give flavor to the napa cabbage, spinach, tofu and noodles. When the hot pot ingredients are ready to serve, I’ll then place the medium rare pieces of beef that I held aside to the broth, let it settle in and then serve it immediately.
**********************************************************************
Okay, so what I wrote above this line was during my thinking phase, considering this special Japanese dish. Here’s what I actually did during my cooking phase:
1. I cooked the sweet potato noodles (dangmyen) until they were tender, drained them and then put them back into the pot after using kitchen shears to cut them into smaller pieces. I then added soy, mirin, dashi and sugar to them and let their heat mix it in until these liquids were dissolved. Sort of like par-seasoning the noodles ahead of time.
2. I prepared the tofu by cutting blocks of soft tofu (that’s all I had and I didn’t want to go out to the store just to buy firm tofu. I basted the rectangular blocks with some Korean bulgogi barbecue sauce and crisped them in a skillet with a little oil. They came out gorgeous and smelled divine.
3. I cut up half a small head of napa cabbage and sauteed it in a little oil in a separate skillet. Removed it when it was fully cooked but still crispy, putting it aside.
4. I cleaned some beautiful pieces of Chinese spinach, tearing out the most fibrous stems and leaving the dark green leaves to add at the last minute to the sukiyaki hot pot.
5. I made the most important sauce, using te-dah!, Bobby Flay’s recipe (yep, that’s right) soy sauce, a little sugar, mirin and dashi stock. I cooked this until all the flavors were blended and it was delicious.
6. Sliced up four green onions into two inch lengths and set aside.
noodles, spinach, cabbage and tofu for sukiyaki
When it was time for dinner, I used a large skillet, coated the bottom with grapeseed oil and at medium high heat, seared some pieces of thinly sliced rib eye beef. Sprinkled the raw side with a little brown sugar and then turned them to cook the other side. Then I took them out of the skillet to add at the end of the dish. The beef drippings were still there as I sauteed the green onions, then placed in segregated sections the napa cabbage, barbecue crisped tofu blocks and sweet potato noodles around the perimeter of the skillet. Poured in the prepared Bobby Flay sauce which was full of flavor. Put on the lid of the skillet and let it all simmer for two minutes. Then turned everything over, added the fresh spinach and let simmer another two minutes. In the well in the middle, I gently placed the medium rare beef and covered it for one more minute. Then, I ladled an arranged sukiyaki bowl for G. and me, beating a raw organic egg in a separate bowl to use for dipping.

Here it is so you can see for yourself how it looked right before we ate it. I have to say, it was worth the extra preparation beforehand because everything in the dish was flavorful and cooked through, while the thin prime rib slices remained medium rare, front and center, savored in all its glory. Yum!
skillet with sukiyaki

popover lessons learned . . .

popovers in the oven
After the previous post was published, I decided that I wanted to share some lessons learned from my foray into baking popovers. At first, I thought it could just be a postscript to the last post, but it was too long, as you can see below.

Some recipes emphasize the temperature of the batter as being the key factor for success. For example, making it up the night before and letting it sit in the refrigerator so it will be so cold as to “explode” and rise when it hits the hot grease in the popover pans.

Others, like Ina Garten’s recipe, just tell you to have the eggs and milk at room temperature before you mix it together and bake right afterwards.

The gruyere recipe called for HEATING the milk almost to a boil before mixing it with room temperature eggs, flour and salt. In my experiments, ALL of them worked to produce humongous popovers. So, pick your poison.

The one thing that I learned along the way which I did not know previously, and which I believe is the real key to success is this: using a popover pan rather than a muffin pan and putting your ungreased popover pan into the heating oven (375 degrees) while you are mixing the batter.

Before turning on the oven, place a sheet of aluminum foil on the rack underneath where you will put your popover pan because grease and batter may spatter into your oven (that’s the real price for making popovers–some mess in your oven, and smoking grease (not good) if you use oil rather than Pam in the cups.) Both racks should be in the bottom third of your oven. Then preheat the oven to 375 degrees with your ungreased popover pan in it.

[Before I knew about only spraying with Pam, I followed a recipe that instructed me to put a tsp. of cooking oil into the bottom of each cup. It was a disaster, as we found out on Christmas Eve, because the oil spilled into the oven as the popovers rose, caught fire (yes!) and began smoking into the oven and then, into the kitchen. This was a harsh lesson learned, and it was also the recipe that was fuzzy about baking the popovers long enough for the insides to be cooked. Later, after the oven had cooled, my daughter, M., patiently cleaned the oven by hand that night so that we could use it the next day to bake cinnamon rolls which we have every Christmas morning while opening presents.]

When the batter is ready, carefully take out the dry, very hot pan out of the oven and spray each cup of the heated pan with Pam, including around the tops of the rims where the batter will bake. This worked out well and no popovers stuck in the pan afterwards. There is nothing more irritating than having to scrape around popovers to get them out of the pan.

I mix the batter in a very large 4-cup Pyrex glass measuring vessel that has a spout. It’s perfect for pouring the batter into the popover pan sprayed with Pam. Fill batter up to the top of the cups, not just halfway or 3/4 way. Put the filled pan into the oven and don’t open the door, nor even think about taking it out before 40-45 minutes is up.

A 375 degree oven for the whole time worked well and is less chancey than the 425 degrees for 15-20 minutes, then turn down the heat to 350 degrees and bake “until they’re done” (too loosey goosey.)

Popping, I’ve learned the hard way (on Christmas Eve when I took them out after 20 minutes at 425 degrees when they were huge and then they all instantly shriveled into little muffin shapes by the time they arrived on the table) is only the first part of baking popovers. They need to pop, THEN, the insides need to bake. Even when the popovers look absolutely done at around 20 minutes and you’re worried about them getting too brown, the last 20 minutes is critical in order to have the popover flesh inside to be baked and not gooey. Do not open the oven door, ever, until they are baked for 40 minutes.

Actually, I’ve not ever come across anyone who doesn’t love popovers, especially fresh out of the oven. The rest of the meal, no matter what you have provided as your main course (prime rib, leg of lamb, roast turkey or baked ham,) quickly recedes into the background when the popovers arrive at the table. We eat them with unsalted butter (I use Kate’s Butter) and Billy Bee honey drizzled on steaming pulled apart crisp pieces of popovers. In my previous post, we found that popovers and a nice salad were enough to make a very satisfying meal.

Oddly, we didn’t go crazy over the gruyere cheese addition to the popover batter. Yes, it was tasty, but I expected more cheesy goodness. So, I think I’ve discovered that for us, classic is best, and I’ll stick to making plain popovers using the heated milk recipe.

I hope these lessons learned will help you if you decide to treat yourself and your family to these gigantic explosions of delight for your table. As mentioned above, I use popover pans, not muffin pans. They are deeper and the shape helps with the pyrotechnics. I have two six cup popover pans that make popovers so big that you can’t get them on your dinner plate. I then bought a twelve cup “miniature” popover pan on Amazon.com that I use instead. The popovers in this pan are plenty huge as you can see from the photos if you remember to fill them to the rim of each greased cup.

Okay, that’s enough on this. If you think I’m a little OCD about making popovers, I’d say you were probably right. Maybe it’s also a reflection of my determined quest to get ALL the many elements required for a four-ingredient recipe to be foolproof, at least for me and my family. Come to think of it, this recipe relies on a combination of the ingredients, physics and chemistry–and maybe that’s why they are so magical when they finally succeed. Good luck making popovers!

My foolproof popover recipe:

2 cups WHOLE milk, heated in a saucepan until almost boiling; then take off the heat
4 room temperature extra-large organic eggs, beaten in a 4 cup glass pyrex vessel with spout
2 cups King Arthur flour, measured and set aside
1 1/2 tsp. salt

1. Place a piece of aluminum foil on the bottom rack; both racks in the bottom third of the oven. Preheat the oven to 375 degrees. Place a dry 12 cup popover pan to heat in the oven while it is preheating.

2. Hand whisk the eggs and salt in the Pyrex bowl. Slowly add the heated milk into the eggs and keep whisking to combine (I was afraid of scrambling eggs at this point)
Add the flour in 1/2 cup increments into the egg mixture until it’s incorporated. Don’t beat, just combine it until everything is mixed in. lumps are okay. Scrape the edge of bowl to make sure everything is combined.

3. With a potholder, take the very hot popover pan out of the oven and spray each cup AND the rim space around the top with PAM.

4. Put the pan down and pour batter into each cup up to the rim. You should have exactly enough to fill all twelve cups.

5. Place in oven, close the door and don’t open it for at least 40 minutes. If your oven is dicey, leave them in for 45 minutes.

6. Shut off the oven; open the door, and leave the popovers in the oven for a couple of minutes to allow them to adjust to the cooler air coming in.

7. Set the popovers on the counter or stove; gently take them out and put on a platter–they should come right out. If not, you didn’t spray enough Pam around the top surface of the pan where the popovers adhere at the rim tops.

That’s all she wrote! (Finally!)

easy does it . . .

popovers in the ovenWe’ve spent all day working on a document that had a deadline and required all our attention. First, G. worked on it for the last couple of days; then I took over last night and was transfixed until 3:30 a.m. Resumed the task at hand from 7:30 a.m. to 2:30. Then G. reviewed what I had done and we finally wrapped it up around 5 in the afternoon. Some Easter day, huh?

It’s a good thing our kids are grown and the granddaughters have bunny business with their families where they live. It was refreshing, actually, to be able to dedicate our time and attention to something singular like this. It was rather a breakthrough in our thinking and so we were also buoyed up by the possibility of progress being made, slow and arduous as it seemed at times.

So, by 5 o’clock in the afternoon, we cleared away the mounds of paper and G. heated up the oven to 375 degrees for the long-awaited black pepper and gruyere cheese popovers I wrote about some weeks ago. I’ve been tweaking popover recipes since the holidays now and so was looking forward to yet another variation for mixing up these few ingredients: room temperature eggs, salt, pepper, whole milk this time heated up almost to boiling in a saucepan, flour in the same proportion of milk.

I slipped the popover pan into the heating oven, deciding to use the twelve cup smaller popover pan instead of the six cup big popover pans. It was the right choice because the batter filled the cups to almost the rim just right. I left a hair of space on the top so that when I dropped small cubes of gruyere cheese into the tops of the batter, it came just up to the top. The heated popover pan from the oven was sprayed with Pam to ensure that the beautiful puffs of golden magic would pop out when baked. The other trick was to leave the popovers in the 375 degree oven for exactly 40 minutes. They pop up amazingly about half way through and the temptation to take them out as they brown and brown some more before the allotted time is so tempting. STAY FIRM. Even if they’ve popped, the softer insides need the time to bake so that the popovers don’t fall immediately after taking them out of the oven. Let the buzzer run out. Open up the oven and let the popovers sit for just a few minutes (while you take pictures if you want) or set out platters to put the popovers on, sprinkling more gruyere cheese on top of them when they’re still hot.

popover closeup

Usually, or in the old days (a few months ago,) I would have probably also made some rack of lamb, rare and on the bone with fresh rosemary, garlic and mustard a la Julia Child. Maybe a small bowl of baby brussels sprouts. But recently, I have been cutting out one dish, then another and G. and I have been happy and satisfied eating this way. So, tonight, along with these gruyere popover treats, I made a salad in the blue spongeware bowl:
spongeware salad

rinsing hearts of romaine in cool water and spinning them dry, broken up in crisp bites first in the old blue bowl. Then, half an asian pear, cored and cut up in medium-ish slivers, crisp and cool; about half a log of garlic herb goat cheese in small chunks, and best of all, a generous handful of those sinful maple glazed walnuts we’re not supposed to have. I made a small amount of vinaigrette with grapeseed oil, a squeeze of Meyer lemon, Japanese Marukan seasoned vinegar, and a dash of maple syrup. Whisked together and dressed in the salad, the light ingredients were a perfect foil for the rather robust popovers. We drizzled Billy Bee honey on the popovers halves pulled apart and steaming. Somehow, this brand of honey has more body and a taste that is discernably sweeter than other honeys we’ve tried.

It was satisfying to enjoy this simple meal together after all the hard work we had spent doing the rest of the day and also the day before. It was oddly also pleasant to have a holiday where we were free to spend the day on something else.

After cleaning up, G. left to take popovers to a neighbor who had been in an automobile accident earlier in the day; and some for his mother and brother who live across the street. We have three popovers left, perhaps for breakfast, or later for a midnight snack if we’re still up.

So, that’s the popover follow-up I promised. Hope you had a good day too.

japanese farm food . . .

DSC_0819Are you as interested in cooking asian food as much as I am? Some rhetorical question, huh? I walked by my bookshelf this morning and the book, “japanese farm food” by Nancy Singleton Hachisu caught my eye. I had purchased it for myself before Christmas but hadn’t really sat down with it to savor its contents as much as I had meant to do.

It’s a thick volume about Nancy’s Japanese life, having met and married a native Japanese farmer named Tadaaki and raising a family of boys for the past twenty years. She comes from hearty New England stock, it seems, after reading her descriptions about her independent mother, who was a professor of medieval English at Dartmouth.

The cookery described in the book is very un-restaurant-ish and there’s no glib food network host lurking anywhere nearby. Instead, what is so refreshing is its very country and home-made approach with simple, robust flavors; e.g., a recipe for Japanese mayonnaise. There’s a recipe for fresh white turnips, pickled in vinegar and salt. Tonight, I’m going to follow her instructions to wrap fresh fish (haddock) in serving sizes, with a sprinkle of Japanese rice wine, slivers of green onions and fresh ginger root. Coddled in their aluminum foil packets, they’ll be steamed in the bamboo steamer for twenty minutes. I already have my favorite sticky rice humming in the rice cooker and will choose between making some sauteed yellow squash with onions or plain cabbage.

What I really enjoy about this book are the many photographs of her home, scraps of old blue indigo fabric here and there; rustic looking pottery and cookware in her kitchen. The only incongruous thing seemed to be her stunning malachite countertop (I wonder what might have happened to provide such a luxurious stone in such a simple setting!) Maybe it’s a reflection of other cooking experiences that Nancy’s had, for example with folks cooking at Chez Panisse in Berkeley, California before she ventured to Japan. Whatever the influences, this book is a rare look inside a Japanese farmhouse, vegetable gardens and barnyard animals with appetizing recipes, an inspiring story about a woman’s transplanted life in Japan.

It’s also keeping me good company on this Spring day with the sun shining outside. And it’s helping me to edge inch by inch into a more simple, even sparse, cooking lifestyle which I feel drawn to in spite of myself. There’s some Yang to this Yin, though, because tomorrow, I’m finally going to try out the recipe for popovers made with black pepper and chunks of gruyere cheese. But that’s okay since opposites make the world go round, right?

a quiet day . . .

flowers with rice cookerHere it is, almost the official day of Spring this week, and it’s gently sleeting outside. One of the heaters is on the fritz downstairs (we have geothermal heat pumped up from a well underneath the house) and sometimes the compressors of the individual units decide to act up. It’s the vagaries of living in a complex of living units that needs to be tuned up just like pianos, some of the time.

I’ve been experimenting with cooking rice, Japanese style, as introduced to me by my daughter, M., who lives in Minneapolis. She gave me the idea of mixing different kinds of rice and keeping a rice cooker humming so that dollops of rice can be had any time of the day, even for breakfast with a soft-boiled egg on top. After trying different combinations including chicken broth, I think my favorite mix at the moment is half Chinese sweet rice (sticky) and half Lundberg’s short grain brown rice. I heat up some dashi broth and add about four short bursts of Ohsawa soy sauce. Mix it up and add twice the amount of broth as rice. Turn the cooker on, and soon afterwards, I can smell fragrant steam rising from the pot.

Yesterday for lunch, I had a small bowl of rice along with one preserved salted duck egg (from the Asian market) and a few pieces of pickled cucumbers. Satisfying, simple and low in calories. Last night, I cooked a dish I made up combining pieces of raw shrimp, minced green onions, baby spinach, stemmed and sliced beaten into fresh eggs. I heated up a skillet with grapeseed oil and made small pancakes with shrimp, spinach and onions in each patty. Turned them over when crisp and served with a dipping mixture containing oyster sauce, Japanese seasoned vinegar, a little soy and a tiny bit of agave nectar. Bowls of the sticky rice with these crisp shrimp and spinach fritters and some pickled cucumber made up our table. Filling and enough flavor to satisfy our appetite. Sometimes, I also add fresh bean sprouts and fresh cilantro to the shrimp mixture. Good both ways!

Afterwards, I came across the Schubert four-hand Youtube clip that I appended to the last post. G. reminded me of another piano duo, Anderson and Roe, that we have enjoyed listening to in the past. Their arrangement and rendition of Michael Jackson’s song, “Billie Jean” is fun to watch and listen to, as is their playful outdoor medley filmed at a Texas University campus.

“Billie Jean” link: http://www.youtube.com/watch?v=yioMN-meE0o

“Viva la Vida” link: http://www.youtube.com/watch?v=5SobrVBFwJo

My life seems to revolve around food and music. I guess that’s not such a bad thing, is it? The other day, I heard about a recipe for making huge black pepper and gruyere popovers from an Austin, TX restaurant clip on the Food Channel. I’ve written about making popovers earlier and can’t wait to try these out, served as a meal with a salad. Maybe I will make them as the main feature for Easter dinner, along with an arugula endive salad with glazed walnuts and pink grapefruit segments. Yum!

little hearts . . .

DSCN4709
So here we are on Valentine’s day eve with a few goodies for enjoyment and fun! I was in Barnes and Noble on Monday afternoon this week, paging through some of the British magazines that I love to look at for ideas but have stopped purchasing in order to save money and space at home. In one of them, (sorry I don’t remember the title to give full credit,) I saw a very charming, yet easy idea to make a Valentine treat. Here it is if you would like to try it out yourself sometime:

Heart tarts with raspberry/cream cheese filling!

The recipe called for mixing some fresh raspberries with whipped cream cheese plus a dab of honey for the filling. Instead, I looked for a jar of raspberry preserves which I thought would have more flavor.

Cream together:
1/2 cup of raspberry preserves
1/4 cup of Philadelphia whipped cream cheese
1 Tablespoon honey

Roll out Pillsbury pie crust and cut out pairs of pastry with heart-shaped cookie cutters.
Take a cookie sheet, line it with aluminum foil and spray with non-stick oil. Place the thickest hearts on the bottom; add a dab of filling in the center of bottom crust. Brush the edges with milk; place second heart pastry on the filling and press the edges together and prick with tines of a fork. Prick the top of the tart with a toothpick for steam to escape.

Bake in preheated 400 degree oven for 12-15 minutes or until golden brown around the edges. The recipe called for icing the heart shaped tarts but I liked the appearance of a tiny bit of confectioners sugar sprinkled on the top while they were still warm. G. took a pair of them slipped into a cellophane sleeve with white polka dots to his 94-year old mother and brother who live across the street. She thought they were “cute.”
**********************************************************************
DSC_0260And if that’s not enough to make our day, this little video may. G. and I were watching a documentary last night on TV that we just happened upon of Bobby McFerrin, the jazz improvisationist and conductor of classical orchestras who has won ten Grammy awards over the years. In the film, he coached four young aspiring singers to improvise together on stage with him, to the tune, “Swing Low, Sweet Chariot.” When asked earlier what would make them successful as musicians in search of making their own mark, his answer was sweet and simple: find your own authentic voice and style ~ so that when one heard it, they would know it was you.

Curious, I looked up more information about Bobby McFerrin, because I remembered he had served as the Creative Chair of the St. Paul Chamber Orchestra, for which my sister and her partner have played for over thirty years. It turns out McFerrin has also conducted other major orchestras all over the world. He is an impressive gent because he is so modest and true to himself. Then, I came across this video of the Israel Philharmonic Orchestra performing the “William Tell Overture.” Here is a link to this piece ~ it will bring a smile to your face!

http://videosift.com/video/Bobby-McFerrin-conducts-the-William-Tell-Overture

Happy Valentine’s Day to all!
DSCN4706

nourishment . . .

DSCN4691I was skype-ing with my daughter, M. this morning when she skipped into the kitchen to show me the dish that had just finished cooking in the rice cooker. To my astonishment, she spooned out what can only be called a melange of rices (arborio, minnesota wild rice, sweet brown rice, Japanese medium grain rice). She then proceeded to tell me, between mouthfuls of rice, that she had not eaten meat, dairy or eggs for the last four weeks, nourished mostly by grains, vegetables and a few treats (like sugarless reese’s peanut butter cups) that she had made herself.

Since she also goes to school, she sometimes presses the rice into the palm of her hand, adds fresh edamame (soybeans) and sometimes wraps the rice balls in nori (seaweed sheets) and brings them for lunch or mid-afternoon snack. By this time, I had mentally scuttled my plans for dinner tonight. I had a cornish hen in the fridge that I usually cut in half, make a little herb bread dressing and then roast the halves on the dressing, basting the hens with melted orange marmalade. This is after I’ve browned the cornish hen halves in a little olive oil and a pat of butter.

Changing gears, I rummaged around my pantry this afternoon and came up with Chinese sweet sticky rice, brown rice, white rice and some wild rice packets. M. had also said that sometimes she cooks the rices with a bit of shoyu and fresh cut up button mushrooms. So my first experiment with this was to combine the three rices with the wild rice packet including seasonings. Then, I cleaned six button mushrooms, sliced them in chunks and plopped them into the rice mixture along with spring water, scantly twice the amount of the combined rice in the rice cooker.

I looked at the cornish hen, rinsed it in cold water, dried it and then cut it into small pieces–legs, wings, and split the breast. Then I marinated it in a small amount of Korean Bulgagi barbecue sauce, sliced green onion and fresh ginger root for about an hour. Broiled the pieces with a quick brush of honey to crisp the skin.
DSCN4682
The rest of the meal consisted of cucumber salad, the tiny crisp cucumbers quarter sliced, then dressed with a small mix of Ohsawa unpasteurized soy sauce, Marukan flavored Japanese vinegar and a little sesame oil. I boiled up a handful of edamame beans to serve as garnish on top of the rice when it was served. DSCN4685

This meal was far more interesting and contained a lot less fat than the dinner I had planned earlier (stuffed cornish hen with baked potatoes.) My thanks to M. for her ideas–she looks radiant from her new regimen and is moving toward vegan/macrobiotic eating. I took a macrobiotic cooking class at Kushi Institute years ago when I had a form of viral meningitis and was determined to heal myself with food and Chinese herbs. G. enjoyed the new rice melange with mushrooms and we made up a plate for our tenant who lives downstairs.

With a blizzard forecasting anywhere from a foot to two feet of snow this weekend, I’m already thinking about the best time to make a large pot of beef shin and vegetable soup with fresh cabbage. On Friday before the storm hits, I’ll slow roast a large chicken that was on sale at the grocery store today along with a handful of baked potatoes. If the power goes out, we’ll have food to provide for all who live here. And then some.

Postscript: I’ve found that by starting three rices (brown, sticky and white rice) in the rice cooker using chicken broth earlier than usual, then letting the cooked rice steam in the cooker for an hour or so afterwards produces delicious, chewy, rice that goes well (better!) with just about everything than plain white rice. I cook twice as much as I need because the leftover rice is also tasty the next day with our evening meal.

brown rice pizza . . .

pizza 1After a run of philosophical topics, it’s finally February and I thought I’d write this post about food. Today, I was at Trader Joe’s where there are a few things you can’t get anywhere else that we enjoy: pistachios that are roasted and UNsalted; grapeseed oil for cooking. I looked at and considered some of the gorgeous orchid plants but restrained myself because I had just cleaned up the orchid plant shelf yesterday, fertilized all the plants: three of them are in bud and ready to flower soon. Plus there are three amaryllis bulbs with green leaves showing that I had forgotten to bring out of the cellar at Christmas time.

As I went by the sprouted wheat bread goods, I came upon a package of “brown rice tortillas.” I thought they looked appetizing and might work as crusts for instant pizzas at home. I bought a jar of Trader Joe’s pizza sauce, remembering that I had some shredded mozzarella and two remaining fresh mushrooms in the fridge at home.

So, for lunch, I put one of the wraps (these will go a long way!) on a cookie sheet, spread some pizza sauce in a swirl like you see them doing on TV, sprinkled the mozzarella and topped with grated parmesan cheese, then arranged the mushroom slices on top. Popped it into a 400 degree oven and took it out about ten minutes later.

G. and I agreed the pizza was “just right” since we each prefer thin crusts and this one was crispy with no bread-y after effects. The edge was crisp and the ingredients all went well together. Last week, we had tried a frozen pizza from the grocery store, adding mushrooms on top of a “pizza margherita”; but the tomatoes tasted like cardboard and the crust didn’t quite hack it either. Now, we have a quick and easy alternative to ordering a pizza for pick-up. And you know what? This one tastes better!
pizza 2

Postscript:
I’m almost ready to make another one! Other ideas for the brown rice wraps might include: mashed white beans (canned) with minced fresh garlic, avocado, red onion, sprouts; prosciutto, smoked gouda shavings, avocado and red onion; hummus, sliced cucumbers, tomatoes, sprouts; bacon, lettuce and tomato wraps… Also, I don’t know how well pizza sauce freezes but I’m going to divide up the rest of the jar that is unused after today’s lunch and see how it works when defrosted.

Lesson Learned, the second time around:
Since the brown rice tortilla worked so well the first time, I made a second pizza for lunch, thinking that I might add a little more tomato sauce and slightly more cheese: more is not better, as it turned out. Here’s what happened, because there was more sauce, the bottom of the tortilla in the middle did not cook to a crisp but was a little soggy. The cheese was okay but had no where to go–so adding more fresh mushrooms worked, but holding back on the wet ingredients worked best. Thought I’d mention this for anyone wanting to try them out! Better to make two “drier” pizzas than one loaded up!